#Divi, #DiviTheme, #DiviBuilder, @divimanager 5 Essential Divi Builder Guide: how to use divi builder? The page builder for the Divi theme by Elegant Themes.
1) How To Enable Visual Builder Divi?
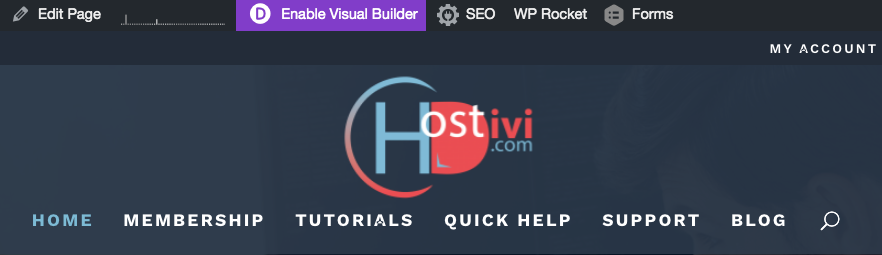
Today we’re looking at how to enable the Divi builder for the Divi Theme. Once you log into your admin panel, hover over the title of your website on the top left, then click on “visit site”.
Navigate to the page that you would like to edit with the Divi Builder. Once you’re on the page that you want to edit, you can click “enable visual builder” at the top.
You’ll see the little spinner change and you get these options here. You can then click and select and edit your text. To save, click the little triple dot at the bottom to expand, click the save button and click exit.
2) Divi Library Items
On the homepage we have a list of books – this whole row with the four books – we want to be able to add that to the individual book pages.
So if we click on a page, example: the Enemy In The Room page, we want to be able to add all four books to the bottom of this page.
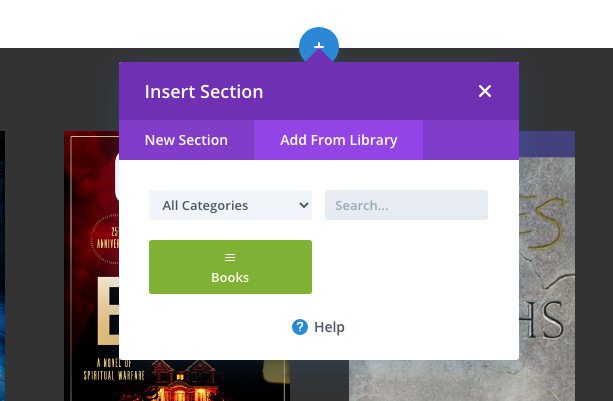
So I’ve already opened that (a page, example Enemy In The Room) in the editor over here, and what we want to do is click the link that says “add from library”. Okay. I’ve already added this item (a Divi Section of all four books) to the Divi library. So you would just hit “add from library” and select it, (our saved Divi Library section) and it just adds the whole row right to the design layout, and then we hit the Update button.
Okay. Then we can verify that we have made the addition to the layout by visiting the page and scrolling down. So once you get down here (at the bottom of the page) you can see the four books, and these are all linked to the other pages, so again if we go to this page we can just edit the page and add the library items there.
3) Using Pre-made Divi Library Layouts
Speed up your website workflow with saved Divi library layouts. From the dashboard you’re going to go to Posts or Pages -> Add New. Since we’re using WordPress 5.0 and it has the Gutenberg installed, we have a different screen and we’re going to click on “use Divi builder”.
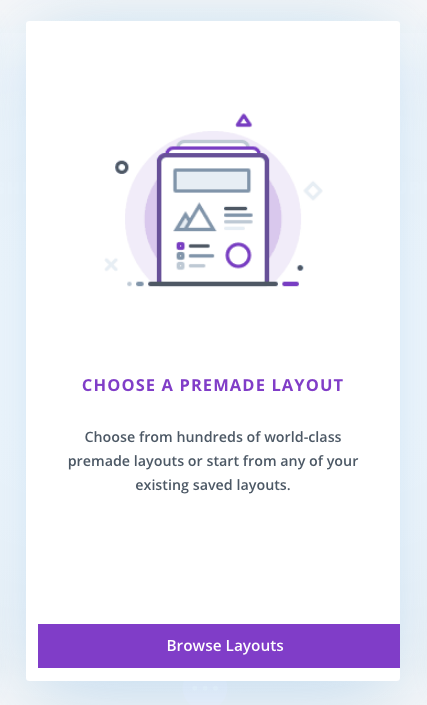
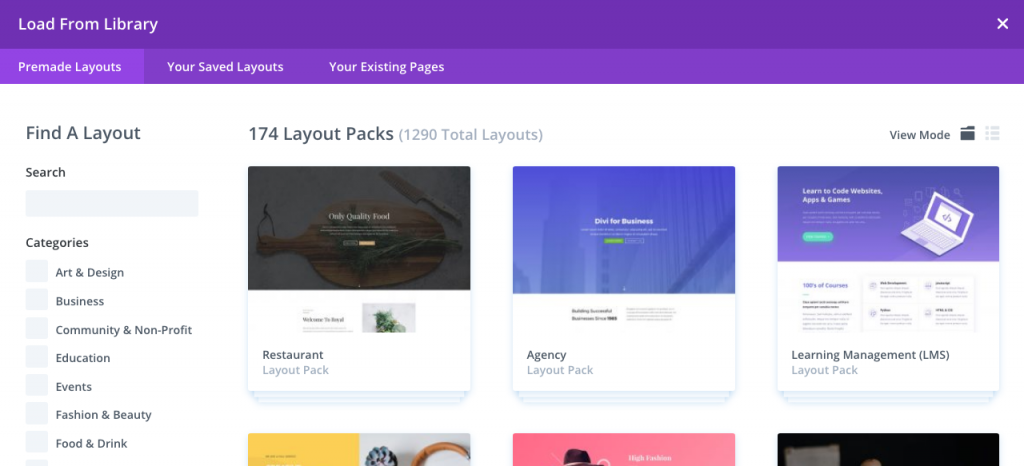
Once the three choices come up on the screen, choose the middle choice: “browse layouts”. Then at the top, choose the middle option: “your saved layouts”, and then choose the layout that you want to use.
I’m gonna choose this detailed double column. Once the layout is loaded you can start editing text. To change the background image you’ll have to click off of the module and then hover over the little gear. Click on “background” and then click the gear again.
4) WordPress Performance Divi Image Size Guide
Why you want to resize your images?
Google uses speed as a measurement for page ranking. Also, not all people on a mobile device have Wi-Fi or the latest, highest network speed. And, since a majority of Wi-Fi visitors are on their mobile, using up data, help them save time and money by reducing the size of your images.
WordPress Performance Image Size Guide:
if you google the image size guide (or click the black button) you will find Elegant Theme’s Ultimate Guide to Using Images within Divi.
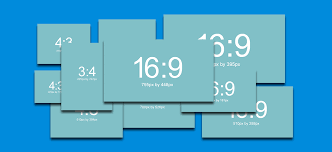
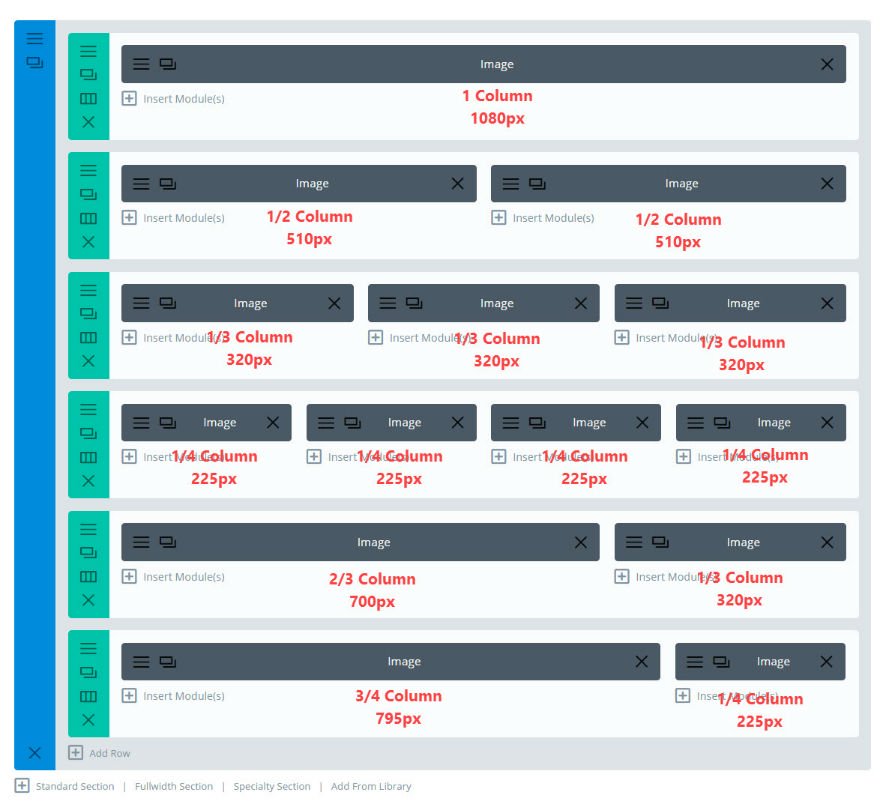
Once you find the article, scroll down ‘til you see the chart on the columns, which is here, and this will tell you exactly how many pixels wide an image should be, based on the number of columns that you are using in your layout. So for example, earlier in our tutorials we were using a one-third column which recommended a 320 pixel-wide image.
By default, WordPress generates a 300-pixel wide image, so you could use those 300 pixel wide images in a 3 column. That would not fill the column, but that would be really close and it would be more optimized than just using the default image size. This is WordPress in 60 Seconds Or Less.

5) Divi Theme Change, Show and Hide Author
We are looking at how to change the name of the author and also how to change the “show and hide the author”. So as you can see on the website, we’ve got the author’s name here underneath the title of the blog post.
We want to change the author’s name so we’re going to edit the post. And then make sure – at the top, one thing that you might…if you don’t see the author selection you have to go into the screen options and toggle that on.

Check the box next to “author” and then you can scroll down to that particular setting and it should be a drop-down box down here. We’re going to change the name of the author to the author of the website. So we can hit the update on that, and then if you want to show and hide.
if you don’t want to show that on the outside of the website you can go to Divi theme options, and then you can just click the little author link here. We’re going to turn this back on, and also in general settings, this would be your blog page as opposed to just the post, which is the single post layout.